
Grouping elements in Wix lets you move, resize, and edit multiple components at the same time, instead of clicking each one individually. If you have a card layout with an image, a heading, and a button, grouping all three means you can reposition the entire card in one drag. This guide explains exactly how to do it, how to undo it, and what the keyboard shortcuts are.
Step-by-Step Guide: How to Group Elements in Wix
The steps below apply to the Wix Classic Editor. If you are using Wix Studio, see the Studio-specific section further down. The process is slightly different.
Step 1: Log into Your Wix Account
Start by accessing Wix and log into your account. If you are new to Wix, you will need to create an account first using your email address or a social media login. If you already have an account, proceed to the next step.
Step 2: Open the Wix Editor
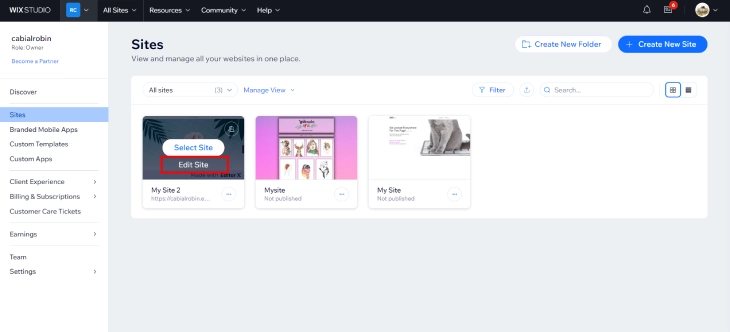
From your Wix dashboard, click Go to All Sites and select the site you want to edit. Click Edit Site to open the Wix Editor. Navigate to the page that contains the elements you want to group.
Step 3: Select the Elements to Group
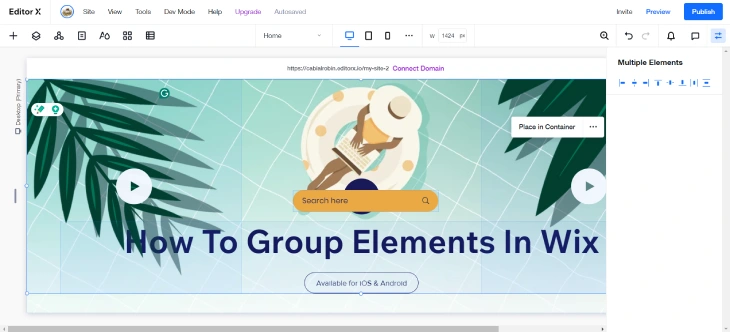
Click on the first element you want to include, then hold Shift and click each additional element. All selected elements will be highlighted with a blue selection border. You can also click and drag across a region to select multiple elements at once.
Before grouping, consider using columns in Wix to arrange elements into a structured layout first. Grouped items within a column stay properly aligned as you resize the page.
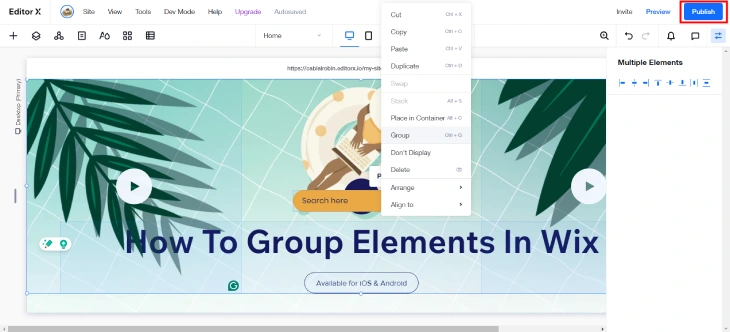
Step 4: Group the Selected Elements

With your elements selected, group them using one of two methods:
- Right-click method: Right-click on any of the selected elements and choose Group from the context menu.
- Keyboard shortcut: Press Ctrl+G (Windows) or Cmd+G (Mac).
The selected elements are now a single group. You will see a unified selection box around all of them, and you can move or resize the entire group as one unit.
Step 5: Save and Publish Your Changes
After grouping your elements, click Publish to update your live website. Your grouped elements will appear as a single unit, making the layout easier to manage going forward.
How To Ungroup Elements in Wix
Ungrouping is just as important as grouping. When you need to edit a single element inside a group, for example, changing the text on one card without moving the image, you need to either enter the group or ungroup it entirely.
To edit a single element inside a group without ungrouping: Double-click the group to enter it. You can then click individual elements to select and edit them. Click anywhere outside the group to exit.
To ungroup completely: Click the group to select it, then use one of these methods:
- Right-click method: Right-click the selected group and choose Ungroup from the context menu.
- Keyboard shortcut: Press Ctrl+Shift+G (Windows) or Cmd+Shift+G (Mac).
After ungrouping, all elements return to their original independent state. Their positions on the page remain unchanged. Ungrouping only removes the linking; it does not move anything.
Grouping Elements in Wix Studio vs the Classic Editor
The grouping feature works in both the Classic Wix Editor and Wix Studio, but the interface is slightly different in each.
In the Classic Editor: Select elements with Shift+click, then right-click and choose Group, or press Ctrl+G. The group appears in your layers panel as a single collapsible item.
In Wix Studio: The process is the same (Shift+click to multi-select, then right-click → Group or Ctrl+G), but Studio's interface labels the action in the Layers panel differently. In Studio, grouped elements appear under a "Group" parent layer, and you can rename the group directly in the Layers panel for easier identification on complex pages.
Studio also supports grouping within sections and repeaters, which gives more layout control than the Classic Editor. This is useful if you are building multi-column card grids.
What Cannot Be Grouped in Wix?
Not every element on a Wix page can be grouped. The following cannot be added to a group:
- Strips and sections: Full-width page sections (strips) are containers themselves and cannot be grouped with regular elements.
- Header and footer: These are fixed layout regions and cannot be grouped with page body elements.
- Wix app elements: Some embedded Wix apps such as Wix Bookings calendars, Wix Stores product grids, or Wix Events widgets cannot be grouped with other elements. They function as standalone app blocks.
- Elements on different pages: You can only group elements that appear on the same page. Cross-page grouping is not supported.
If you try to group an unsupported element, Wix will either exclude it from the group silently or show an error prompt. In that case, group the remaining compatible elements and position the unsupported element separately.
When to Use Grouping vs Columns vs Containers in Wix
Wix gives you three structural tools for organizing page elements: groups, columns/grids, and containers. They are not interchangeable. Each one solves a different problem, and choosing the right one saves you a lot of rework later.
Groups are best when you want to move or duplicate a set of elements as a single unit without worrying about responsive behavior. A group does not add any background, padding, or layout logic. It just links elements together so they travel as one. Use groups when you are building a card you plan to copy across a page, or when you want to lock the relative positions of a few overlapping elements.
Columns and grids are the right choice when you need responsive layout that stacks automatically on mobile. A two-column or three-column grid in Wix will collapse into a single column on smaller screens without manual adjustment. If your layout needs to reflow for mobile visitors, start with columns rather than groups.
Containers (sometimes called boxes) are best when you want a visible boundary around a set of elements: a background color, a border, rounded corners, or internal padding. Containers also clip their contents, so elements inside stay within the box even if you resize it. Use a container when your design calls for a card with a colored background or a bordered section within a page.
In practice, you often combine all three. For example: build a three-column grid for the overall layout, place a container in each column for the card background, then group the image, heading, and button inside each container so you can duplicate and reposition the card unit quickly.
Benefits of Grouping Elements in Wix
Grouping elements on your Wix website makes design work faster and keeps your layouts consistent. Here are the key advantages:
Organisation
Grouping keeps related items together, making your Layers panel tidier and your layout logic clearer. A card made of an image, heading, and button is easier to manage as one group than as three separate elements scattered through the layers list.
Efficiency
Once grouped, you can move, resize, and duplicate the whole unit in one action. Here is a concrete example of how grouping speeds up building a three-column card layout:
- Add an image element, an H3 heading beneath it, and a button below the heading for your first card.
- Shift+click to select all three elements, then press Ctrl+G (or Cmd+G on Mac) to group them.
- With the group selected, press Ctrl+D twice to duplicate it. You now have three identical card groups on the page.
- Drag each group into position side by side across the page.
- Double-click into each group to swap the image, update the heading text, and change the button label independently for each card.
The result: a three-column card section built in a fraction of the time it would take to construct each card from scratch. Grouping is what makes the duplicate-then-customize workflow possible.
Consistency
Grouped elements stay in the same relative positions as you move them, so your layout proportions remain consistent across sections. This matters especially when you are copying a design pattern to multiple pages.
Responsive Design
When you switch to the mobile editor, grouped elements often adapt better than ungrouped ones. The group is treated as a single unit for stacking and scaling purposes, which reduces the manual adjustment needed to make mobile layouts look right.
Troubleshooting: Grouping Problems in Wix
Grouping is usually straightforward, but a few situations can trip you up. Here is what to do when things do not go as expected.
You Can't Select All Your Elements
If clicking and dragging only selects some of your elements, check whether any of the missing ones sit inside a strip, section, or container that is separate from the others. Elements on different sections of a page cannot be grouped together. You can only group elements that live in the same parent container or the same page region. Move all the elements you want to group into the same section first, then select and group them.
The Group Option Is Greyed Out
If the Group option in the right-click menu is greyed out, or Ctrl+G does nothing, at least one of your selected elements is a type that cannot be grouped. Common culprits include Wix app widgets such as Wix Bookings, Wix Stores product grids, and Wix Events blocks. Deselect the app element, select only the standard elements (text, images, buttons, shapes), and try grouping again. You can then manually position the app widget next to the group.
Grouped Elements Look Different After Publishing
If your grouped elements look correct in the editor but shift or overlap on the published site, the most common cause is a mismatch between desktop and mobile positioning. The desktop editor and mobile editor maintain separate positions for elements. After grouping, switch to the mobile editor and check how the group appears. You may need to enter the group in mobile view and adjust individual element positions there.
Grouped Elements Moved on Mobile After Grouping
Grouping does not automatically fix mobile layout. If elements were already positioned individually in the mobile editor before you grouped them on desktop, grouping on desktop can reset their mobile positions. After grouping, always open the mobile editor and verify the group's position and internal layout. Adjust as needed within mobile view.
You Can't Find the Group in Your Layers Panel
Groups appear as a single collapsed item in the Layers panel. If you are looking for a specific group and can't find it, scroll through the layers list and look for items labeled "Group." Click the arrow to the left of any Group layer to expand it and see the elements inside. In Wix Studio, you can rename groups directly in the Layers panel, which makes them much easier to find on complex pages.
How to Group Elements in Wix: Key Shortcuts
For quick reference, here are the keyboard shortcuts for grouping in Wix:
- Group: Ctrl+G (Windows) / Cmd+G (Mac)
- Ungroup: Ctrl+Shift+G (Windows) / Cmd+Shift+G (Mac)
- Select multiple elements: Shift+click each element
- Enter a group to edit individual elements: Double-click the group
- Exit group editing mode: Press Escape or click outside the group
Using keyboard shortcuts speeds up the design process considerably, especially when you are building out repeated layout patterns across multiple pages.
How to Add Hover Effects to a Grouped Element in Wix
One underused feature is applying a hover effect to an entire group at once, rather than setting hover states on each element inside it separately. When you apply a hover effect to a group, every child element inside animates together as a single unit. This produces a much more coordinated result than trying to synchronize individual hover effects on multiple elements.
To add a hover effect to a group in the Classic Editor:
- Click the group to select it (a single click on the unified group, not a double-click into it).
- Right-click the selected group and choose Add Hover Effect from the context menu.
- Select the animation type you want (fade, zoom, slide, etc.) and set the speed.
- Click Apply to confirm.
The hover effect now triggers whenever a visitor moves their cursor over any part of the group. All elements inside the group respond simultaneously, so a card with an image, heading, and button will all fade or zoom together on hover.
This differs from applying hover effects to individual elements inside the group. If you double-click into the group and apply a hover effect to just the image, only the image responds to the cursor. The heading and button stay static. Applying the effect at the group level is the better approach for card-style designs where the whole card should feel interactive.
One thing to note: hover effects applied at the group level do not transfer if you later ungroup the elements. If you ungroup, the hover effect is removed and you will need to reapply it to the individual elements.
How Many Elements Can You Group in Wix?
Wix does not publish a hard limit on how many elements can be included in a single group. In practice, however, groups containing 15 or more elements can start to feel sluggish in the editor, with slight delays when selecting, moving, or duplicating the group. This is especially noticeable on older hardware or when working on pages that already have many elements.
The better approach for complex layouts is to use nested groups. Instead of putting 20 elements into one large group, group related elements into smaller sub-groups first, then group those sub-groups together. This keeps each group manageable and makes it easier to enter and edit specific parts without disrupting the whole structure.
A pricing table section is a good practical example of how this works:
- Each pricing card contains a plan name, a price, a list of features, and a sign-up button. Select those four elements and group them as "Basic Card," "Pro Card," and "Enterprise Card" respectively.
- Once each card is its own group, Shift+click all three card groups and press Ctrl+G again to create a top-level group containing all three cards.
- You can now move the entire pricing table as one unit by dragging the top-level group. To edit a single card, double-click into the top-level group, then double-click again into the specific card group you want to change.
This nested structure keeps the editor responsive, makes the Layers panel readable, and gives you precise control over individual cards without losing the ability to reposition the whole section at once.
How to Copy a Group to Another Page in Wix
Copying a group to a different page in your Wix site is a straightforward process, but there is one common issue that catches people off guard. Here are the steps and how to handle the problem if it comes up.
- Click the group you want to copy to select it.
- Press Ctrl+C (Windows) or Cmd+C (Mac) to copy it.
- In the Wix Editor, open the Pages menu on the left side and navigate to the target page.
- Once the target page is open in the editor, press Ctrl+V (Windows) or Cmd+V (Mac) to paste the group.
The group will appear on the target page, usually near the center of the visible canvas. Drag it into the position you want.
The common issue to watch for: copied groups sometimes lose their z-index position when pasted onto a new page. Z-index controls which elements appear in front of or behind others. If your pasted group appears underneath other elements on the target page, or if elements inside the group are layered in the wrong order, use the Arrange option to fix it.
To reset the layer order after pasting, right-click the pasted group and choose Arrange. From there you can select Bring to Front, Send to Back, Bring Forward, or Send Backward to place the group at the correct depth in the page's layer stack. If individual elements inside the group are out of order, double-click into the group and use the same Arrange options on each element.
This copy-paste method works for copying groups between pages within the same site. Copying a group from one Wix site to a completely different Wix site requires recreating the group manually, as the clipboard does not carry elements across separate Wix accounts or sites.
How Groups Affect Wix Animations
Wix lets you apply entrance and exit animations to individual elements, but applying an animation to a group produces a noticeably different result. When you animate a group, every element inside it moves and transitions together as one unit. This creates a much more polished effect than trying to time individual animations across multiple separate elements.
To add an animation to a group:
- Click the group to select it (a single click, not a double-click into the group).
- Right-click and choose Add Animation from the context menu.
- Pick an entrance effect (Fade In, Slide In, Zoom In, etc.) and set the duration and delay.
- Click Play to preview, then Apply to confirm.
Group-level animations are particularly effective for hero sections, call-to-action panels, and feature cards. A hero section with a heading, subtext, and a button looks far more intentional when all three elements fade in together than when each one arrives at a slightly different time with its own individually configured animation.
Wix scroll animations also work on groups. You can set a group to animate as it enters the viewport while the visitor scrolls down the page. This is a good option for testimonial sections, feature grids, and content blocks you want to draw attention to progressively as the visitor moves through the page.
One important caveat: scroll animations on groups can behave differently on mobile and touch devices. The trigger points for scroll-based animations are calculated differently on touch screens, and some animations may appear to fire too early, too late, or not at all on certain mobile browsers. After setting up scroll animations on a group, always preview the page on a mobile device (or use the mobile editor's preview mode) and test the scroll behavior before publishing. If the animation is unreliable on mobile, switching to a simpler entrance animation (triggered on page load rather than scroll position) is a safer option for that group.
Grouping Elements in Wix: What to Do Next
Once you have grouped your elements, the next step is usually handling the mobile view. Open the mobile editor by clicking the phone icon at the top of the Wix Editor and check that your grouped elements stack and resize correctly on smaller screens. You may need to enter the group, select individual elements, and adjust their mobile positioning separately.
If you find that a grouped element is not responding as expected in the mobile view, ungrouping and re-grouping after setting mobile positions individually can resolve the issue.
* read the rest of the post and open up an offer