
How to Use Wix: Step-by-Step Guide for Beginners
Wix is one of the most beginner-friendly website builders available, and you can go from a blank screen to a published website in under two hours without touching a line of code. The platform gives you two paths to start: the Wix AI Site Builder, which creates a site based on your answers to a few questions, and the Wix Editor, where you build from a template with full drag-and-drop control. Most beginners start with one of these and switch as their needs grow.
Below is a complete step-by-step guide on how to use Wix, covering everything from creating your account to publishing and optimizing your site.
Before You Start: Which Wix Editor Should You Use?
Before working through the steps below, pick your starting point. Wix gives you two main options:
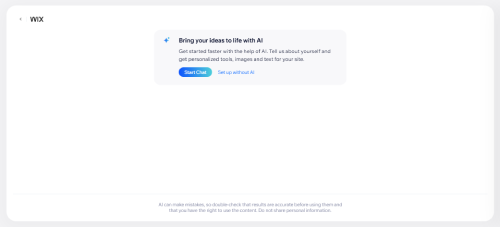
- Wix AI Site Builder: Answer a few questions about your business or project, and Wix generates a complete site with pages, text, and images pre-populated. Best for users who want something live quickly and are happy to edit from a working foundation.
- Wix Editor (Classic): Choose a template and customize it from scratch using drag-and-drop tools. Best for users who want full visual control over every element from day one.
If you are completely new to website builders, start with the AI Site Builder - it produces a usable site in minutes and you can keep editing after. If you have specific design requirements or prefer working from a blank canvas, the Wix Editor gives you more precision.
How To Use Wix: A Step-By-Step Guide
Step 1: Sign Up For A Wix Account
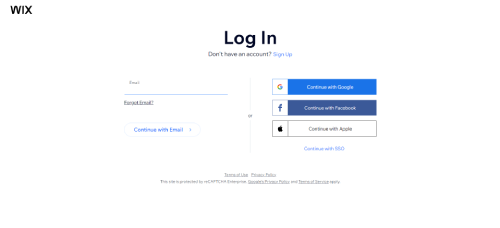
Go to Wix.com and click "Get Started." You can sign up with your email address, Google account, or Facebook account. Creating an account is free and takes under two minutes.
Once signed in, you land in the Wix Dashboard - the central hub where you manage your sites, domains, billing, and account settings. If you plan to build multiple sites, each one gets its own dashboard panel and separate URL.
There are numerous Wix pricing plans that you can choose from. There's also a free plan that you're able to sign up for. Be sure that you use a plan that is suitable for your needs. If you need to take payments online, make sure that you sign up for a plan that can take payments.
Step 2: Pick A Template
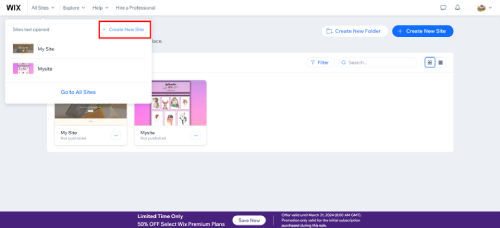
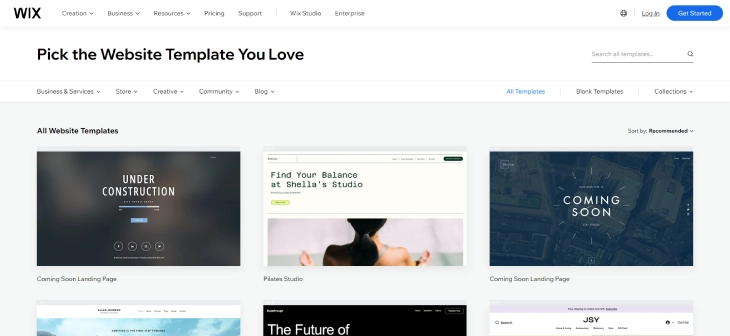
From your dashboard, click "Create New Site." You will be asked whether to use the AI Site Builder or start with a template. If you choose a template, Wix shows you categories - business, portfolio, online store, blog, restaurant, and more. If you want to build a blog specifically, the guide on how to create a blog with Wix covers the complete setup from template to first published post. If you are building a photography site, our roundup of the best Wix photography templates can help you choose the right starting point.
Wix has over 900 templates, all free to use. You can preview any template before selecting it. One important rule: you cannot change your template the traditional way after your site is published. If you need a different look, see our guide on how to change your Wix template - there are three tested workarounds. Take your time at this stage - click through a few options to see the layouts, sections, and overall style before committing. Switching later means rebuilding from scratch.
Step 3: Update Text and Images
Once you open your template in the Wix Editor, you will see your site's pages on the left and a live preview in the centre. Click directly on any text block to edit it - just type to replace the placeholder text with your own content.
To master all the text element types Wix offers - from collapsible text to text masks and global font settings - see our dedicated guide on how to add and edit text on Wix.
To replace an image, click on it and select "Change Image." You can upload your own photos, use images from Wix's free stock library (Wix Media), or connect to Shutterstock. For logos, use the Wix Logo Maker or upload a PNG with a transparent background. For a full walkthrough, see our Wix Logo Maker guide covering the step-by-step process, file formats, and troubleshooting.
Work through every page of your site - homepage, About, Contact, Services, and any additional pages your template includes. Leaving any placeholder text on a live page looks unprofessional and can hurt your SEO.
Step 4: Personalize Background
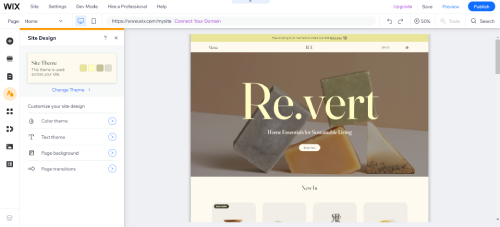
Click on the "Background" option in the left-hand Wix Editor menu to change the background of any page. You can set it to a solid color, gradient, image, or video. For a professional result, use a single brand color or a high-quality image that matches your industry.
Wix also lets you set different backgrounds per page. Your homepage might have a bold hero image background, while your contact page might use a clean white background for easier form reading. You can also explore Wix animations to add entrance effects, hover interactions, and scroll-triggered motion to any element. If you want to go deeper into the visual side of your site, our full guide on how to design a website with Wix covers layouts, color schemes, fonts, and more.
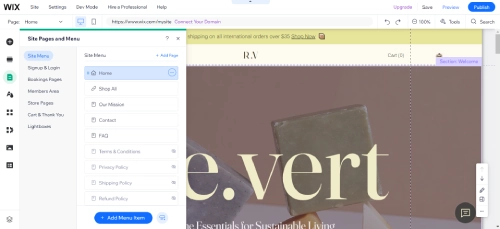
Step 5: Add Pages
In the Wix Editor, click "Pages" in the left sidebar to manage your site structure. You can add new pages (About, FAQ, Blog, Portfolio, etc.), rename existing ones, set page visibility, and reorder them in the navigation menu. For a complete walkthrough of adding pages and configuring navigation, see our guide on how to create a new page on Wix.
Every page you add should have a clear purpose. Avoid creating pages that duplicate content from other pages or that have fewer than 300 words - thin pages drag down your overall SEO. For most small business websites, five to eight pages is a solid foundation: Home, About, Services, Portfolio or Gallery, Blog, and Contact.
Step 6: Add Apps
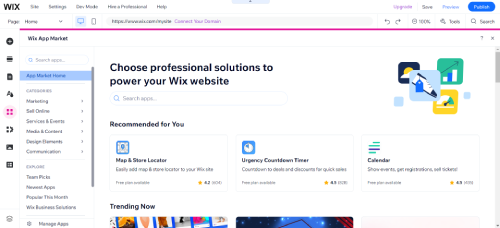
The Wix App Market gives you access to 300+ apps that extend what your site can do - from booking systems and live chat to social feeds and email opt-in forms. To access it, click "Add Apps" in the Wix Editor sidebar, or visit the App Market from your dashboard.
To understand what Wix apps are and how they work before installing, see our guide on what a Wix app is - it covers the App Market categories, popular apps, and how to manage your installed apps.
You can also add popup overlays - known as Wix lightboxes - directly from the Add Elements panel without any app installation.
For nonprofits and charities, the Buttons section in the editor also includes a PayPal Donate option. Our step-by-step guide explains exactly how to add a donate button on Wix, including alternative apps for recurring donations and Stripe support.
Not every app is free. Many have freemium models where the basic version is included but advanced features require a paid subscription. Before installing an app, check its pricing tier so you understand what you are committing to. Start with the apps most relevant to your site type and add more gradually - too many apps can slow your site's load time.
Step 7: Add Blog
To add a blog, go to your Wix Editor, click "Add Apps," and install the Wix Blog app. Once added, a Blog page appears in your site navigation automatically. From there you can write and publish posts, organize them into categories, enable comments, and let readers subscribe for updates.
A blog is one of the most effective ways to build organic search traffic over time. Pages that cover specific topics and questions your customers are searching for can drive consistent visitors to your site. Even publishing two to four posts per month builds meaningful SEO momentum over six to twelve months.
Step 8: Online Store
To sell products through your Wix site, add the Wix Stores app from the App Market. This activates a full eCommerce setup: product pages, shopping cart, payment processing, inventory tracking, and order management - all from your Wix dashboard. For large catalogs with many SKUs, Wix dynamic pages let you build one template that automatically generates a URL for every product in a CMS collection, saving hours of manual page creation.
You will need to be on at least the Core plan to take payments through your store. Setting up Wix Payments is the simplest option since it connects directly to your dashboard, but you can also use Stripe, PayPal, or other supported providers. Add your products with clear photos, descriptions, and pricing before going live.
Step 9 - SEO Optimization
Wix has a built-in SEO setup tool called Wix SEO. Go to your dashboard, click "Marketing & SEO," then "Get Found on Google" to start the guided setup. The tool walks you through setting meta titles, meta descriptions, and page URLs for each page.
Beyond the basics, make sure each page has a unique H1 heading, includes relevant keywords naturally in the body text, and links to other pages on your site. Submit your sitemap to Google Search Console after publishing - Wix generates a sitemap at yoursite.com/sitemap.xml automatically.
Step 10: Mobile Optimization
Wix automatically creates a mobile version of your site, but it needs review. In the Wix Editor, toggle to Mobile view using the phone icon at the top of the editor. Check every page - some elements that look good on desktop may stack awkwardly, overlap, or appear too small on a phone screen.
You can make mobile-specific adjustments without affecting the desktop version. Hide elements that clutter the mobile layout, increase font sizes, and make sure buttons are large enough to tap comfortably. With over half of web traffic coming from mobile devices, this step directly affects both user experience and search rankings.
Step 11: Domain Name
On the free plan, your site URL follows the format username.wixsite.com/yoursite. To use a custom domain like yourbusiness.com, you need a paid plan.
You can register a new domain through Wix directly from your dashboard (Wix includes a free domain for the first year on paid annual plans), or connect an existing domain you own from another registrar. Either way, domain connection is handled in the dashboard under Settings > Domains. DNS propagation typically takes 24-48 hours after connecting a new domain.
Step 12: Publish
When you are ready to go live, click the "Publish" button in the top-right corner of the Wix Editor. Your site immediately becomes accessible at your URL. Any changes you make after publishing take effect when you click Publish again - your visitors always see the last published version, not your in-progress edits.
After publishing, submit your URL to Google Search Console so Google knows your site exists. Check your site on both desktop and mobile one final time from a browser (not the editor preview) to confirm everything displays correctly.
How Long Does It Take to Learn Wix?
The time it takes to get comfortable with Wix depends on what you want to build and how much experience you bring.
For complete beginners, publishing a basic site takes 1 to 4 hours from account creation to going live. A more polished site with 5 to 8 pages, custom branding, and a full content review typically takes a weekend of focused work.
For designers or developers, the Wix Editor's visual model usually takes 2 to 4 hours to feel natural. Wix Studio (the professional version of the editor, aimed at agencies) has a steeper learning curve. Its CSS-like layout controls and breakpoint system are more similar to Webflow than to a typical drag-and-drop builder, and may take a few days to get comfortable with.
The drag-and-drop model means you learn by doing. Most people figure out 80% of what they need in their first session, then learn the remaining 20% as they encounter specific needs (setting up a booking system, creating a CMS collection, adding a form). You do not need to understand the whole platform before publishing something useful.
Wix provides several resources to speed up the learning process:
- Wix Learn: A video library covering the editor, SEO, marketing, and more. Found at support.wix.com/en/wix-learn.
- Wix Help Center: Step-by-step articles for almost every feature. Searchable by topic.
- Wix Community Forum: A forum where Wix users and Wix staff answer questions. Useful for edge cases and troubleshooting.
The fastest way to learn Wix is to start building. Pick a template, get something published, and work through problems as they come up. If you want structured help, check out the best Wix courses available online for guided walkthroughs of every major feature.
Common Mistakes to Avoid When Using Wix
Most beginners run into the same issues. Here are the ones worth knowing before you start:
- Choosing a template too quickly. You cannot change your Wix template once your site is published. Spend time previewing several templates before committing. If you decide later that you want a different layout, you have to rebuild from scratch.
- Leaving placeholder text live. Every template comes with sample text. Leaving "Your Name" in a heading or "Lorem ipsum" in a paragraph looks unprofessional and confuses Google about what your page is about.
- Skipping mobile review. Wix's auto-generated mobile layout does not always look good. Always switch to Mobile view in the editor and adjust anything that breaks or overlaps.
- Not connecting a custom domain. A free Wix subdomain (username.wixsite.com/site) makes your site harder to find and remember. Connect a real domain as soon as your site is ready to be taken seriously.
- Publishing without setting meta titles and descriptions. Each page needs a unique meta title and description for search engines. The Wix SEO tool prompts you for these - don't skip this step.
- Skipping a privacy policy. If your site collects email addresses, uses analytics tools, or accepts payments, a privacy policy is legally required in most countries. It also satisfies requirements from Google Analytics, Meta Ads, and other third-party services. See our guide on how to add a privacy policy on Wix.
- Installing too many apps at once. Each additional app can add to your page load time. Install what you actually need, test your site speed after adding apps, and remove anything you are not using.
Wix Editor vs Wix Studio: Which Should You Use?
Wix offers two distinct editors and you choose between them when you create a site. You cannot switch editors after a site is built, so it is worth understanding the difference before you start.
Wix Editor (Classic) is the standard drag-and-drop editor. You pick a template and customize it by clicking on elements and moving them around the page. It is what all 12 steps in this guide cover. This editor suits small businesses, personal sites, bloggers, and anyone who wants a professional-looking result without a technical background.
Wix Studio is Wix's professional-grade editor, formerly called Editor X. It gives you CSS-like layout controls, a responsive design system with breakpoints for different screen sizes, and tighter control over how elements behave across desktop, tablet, and mobile. The learning curve is steeper than the Classic Editor, and the interface is more complex.
Who should use Wix Studio:
- Freelancers and agencies building sites for clients who need precise multi-device layouts
- Developers who are comfortable with CSS concepts like flexbox and grid
- Anyone who needs pixel-level control over how a site looks at specific screen widths
Who should stick with the Classic Editor:
- First-time site builders who want to get something live without a long learning curve
- Small business owners who need a usable result quickly
- Anyone building a personal site, portfolio, or blog without complex responsive requirements
If you are not sure, start with the Classic Editor. You can always build a separate site in Wix Studio later once you understand the platform.
Wix Automations: Save Time After You Launch
Once your site is live, one of the most useful features new users overlook is Wix Automations. Most people set up their site and move on without realizing that automations can handle routine tasks that would otherwise require manual follow-up.
Automations trigger actions based on events on your site. A visitor submits a contact form and they automatically receive a confirmation email. A customer makes a purchase and they get a receipt and a follow-up message three days later. Someone subscribes to your mailing list and a welcome email goes out immediately. All of this happens without you doing anything manually after the initial setup.
To access automations, go to your Wix dashboard and click Marketing & SEO, then Automations. Wix provides pre-built templates for the most common workflows, so you do not need to build them from scratch.
The most useful automations to set up right after launching:
- Contact form acknowledgement: Sends a reply to anyone who fills out your contact form, confirming you received their message.
- New subscriber welcome: Sends a welcome email to anyone who joins your mailing list.
- Booking confirmation: If you use Wix Bookings, sends a confirmation to customers when they schedule an appointment.
For a full walkthrough of triggers, conditions, and advanced workflows, see our guide on how to use Wix automations effectively.
Using Wix for Specific Types of Websites
Wix works for almost any kind of website, but what you actually need to configure varies depending on your goal. Here is what to prioritise once you have completed the basic steps above, depending on the type of site you are building.
Restaurant or Food Business
After setting up your basic site, add the Wix Restaurants app (or Wix Menus for a simpler menu-only setup). This gives you a digital menu, online ordering, table reservations, and delivery management. Key steps: connect a payment provider, set delivery zones and minimum order amounts, and sync your menu hours with your actual kitchen schedule. Most restaurant owners also add the Wix Chat app so customers can ask questions before ordering.
Photography or Portfolio Site
Templates in the Portfolio category come with Wix Pro Gallery pre-installed, which handles large-volume image galleries with multiple layout options including Grid, Masonry, and Slideshow. Add a Contact form and a Pricing page if you take bookings. To sell prints or digital downloads, install Wix Art Store, which is designed specifically for photographers. Password-protect specific galleries for client proofing using Wix's built-in page password feature under Page Settings.
Online Store
Beyond the Wix Stores setup in Step 8, add product reviews using the Wix Product Reviews app, configure abandoned cart recovery emails in Wix Automations, and set up Wix shipping and Shipping Labels to speed up order fulfillment. Set up a dedicated category page for each product group and link your store to Facebook and Instagram Shop through the social channel integrations in the Marketing and SEO section of your dashboard.
Blog or Content Site
Install the Wix Blog app (covered in Step 7) and create your first three categories right away. Add Wix Members if you want reader accounts and subscriptions. Connect your blog to an RSS feed and submit it to Google Search Console after publishing your first five posts. Even on a free plan, you can collect email subscribers and send newsletters directly from the Wix dashboard through Wix Ascend. Consider embedding video in your posts as well - our guide on how to add video on Wix covers all three methods.
Service Business or Freelancer
Add Wix Bookings to let clients schedule appointments directly from your site. Configure your services, working hours, and booking confirmation emails before going live. Add a Pricing page that clearly lists your service packages with calls to action on each. For businesses that generate leads rather than direct bookings, set up a multi-step contact form combined with a follow-up automation in Wix Automations so no inquiry goes unanswered.
Conclusion: How to Use Wix
Wix is designed to be usable by anyone, with no technical background required. The 12 steps above take you from a blank account to a published, SEO-ready website. Start with the free plan to explore the editor and choose your template, then upgrade when you need a custom domain, an online store, or a professional email address. The most important steps are the ones most people skip: reviewing mobile layout, writing unique content for every page, and setting up Google Search Console so your site can be found. If you ever need to stop your plan, our guide on how to cancel your Wix subscription covers every scenario including what Wix offers to keep you.
* read the rest of the post and open up an offer