
To add events to your Wix Calendar, install the Wix Events & Tickets app from the App Market, click "Add Event" from your dashboard, fill in the event name, date, time, and location, then customize the event page and publish. The entire process takes less than five minutes.
This guide walks through each step in detail, including how to set up different event types, configure RSVP and ticketing options, choose a calendar display layout, and sync everything with Google Calendar so you can manage events from one place.
Step-by-Step Guide to Adding Events to Your Wix Calendar
Before you can add events, you need the Wix Events & Tickets app installed on your site. Follow these steps to get everything set up.
Step 1: Log Into Your Wix Account
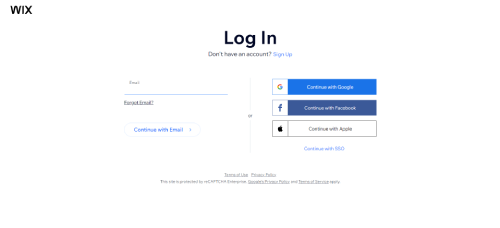
Go to Wix and sign in with your email, Google account, or Facebook. If you don't have an account yet, create one first. Once logged in, you'll land on your site dashboard.
Step 2: Open the Wix Editor
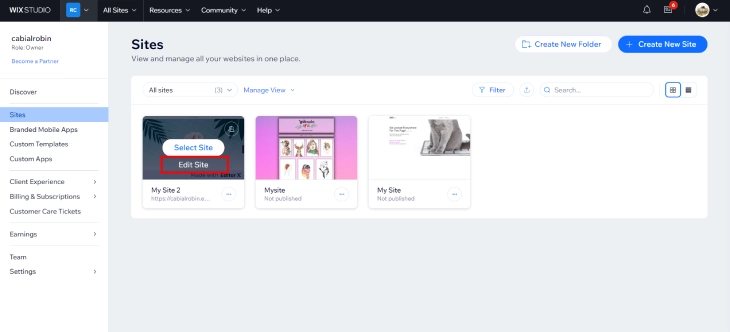
From your dashboard, click "Go to All Sites" if you manage more than one. Select the site where you want to add events and click "Edit Site" to open the Wix Editor.
Step 3: Install the Wix Events & Tickets App
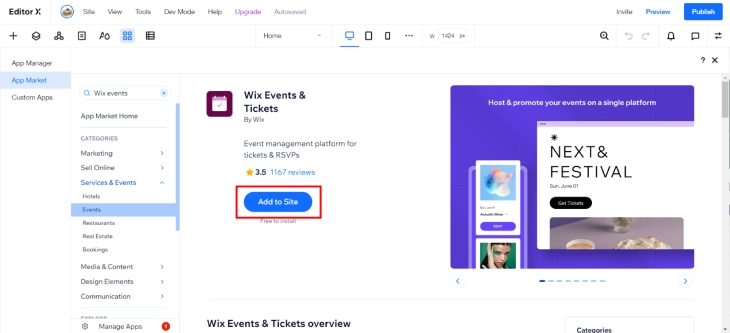
Open the Wix App Market from the left sidebar of the Editor (or from your dashboard under "Apps"). Search for "Wix Events & Tickets" and click "Add to Site." The app installs automatically and creates an Events page on your site. You can also find event-related apps in our roundup of the best Wix Market apps.
Step 4: Click "Add Event"

After installation, go to your site dashboard and find "Events" in the left menu. Click "Add Event" to open the event creation form. You'll enter the event title, date, start and end times, and location (physical address or online link). Add a description that tells visitors what to expect, who should attend, and what they'll get out of it.
Step 5: Customize the Event Page
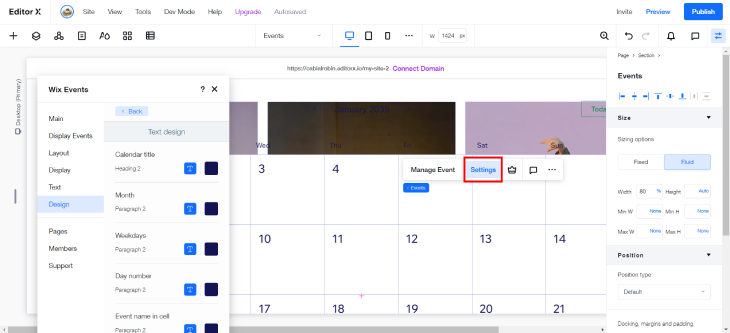
Each event gets its own page. Click "Settings" to adjust the layout, colors, and fonts to match your site's branding. Upload a cover image that represents the event. Write a detailed description including the schedule, speakers or hosts, and any requirements. When you're satisfied, save and publish your site to make the event live.
Types of Events You Can Create
Wix Events supports three main event formats. Choose the right one based on how your event is structured.
Single Events
A single event happens once on a specific date. This works for product launches, one-time workshops, grand openings, or networking meetups. Set the start date, end date, and time, and the event appears on your calendar for that day only.
Recurring Events
Recurring events repeat on a set schedule: daily, weekly, monthly, or on custom dates. Use this for weekly fitness classes, monthly community meetings, or biweekly webinars. When you create a recurring event, Wix generates individual event instances so attendees can register for specific dates.
Multi-Day Events
Multi-day events span more than one day. Conferences, retreats, festivals, and training programs often run across two or more days. Set the start and end dates, and the event block stretches across those days on your calendar. You can add a detailed agenda for each day in the event description.
Setting Up RSVP, Tickets, and Registration
Every event needs a way for people to sign up. Wix gives you three registration options, and you pick the one that fits when creating your event.
- RSVP only: Free events where you just need a headcount. Visitors click "RSVP" and enter their name and email. You can set a guest limit if the venue has a capacity cap.
- Ticketed events: Sell paid tickets directly through your site. Create multiple ticket types (early bird, VIP, general admission) with different prices. Wix processes payments through Wix Payments, PayPal, or Stripe. If you need more details on payment setup, check our guide on how to use Wix Bookings, which covers similar payment workflows.
- External registration: If you use a third-party platform like Eventbrite, add an external registration link so the "Register" button redirects visitors there instead.
For ticketed events, you can also configure a registration form to collect extra information like dietary preferences, T-shirt sizes, or company names. Go to "Registration Form" in the event settings and add custom fields.
Calendar Display Options
How your events appear on the site depends on the layout you choose. Wix offers several display styles through the Events widget settings in the Editor.
- List view: Shows events in a vertical list with the event image, title, date, and location. Good for sites with many upcoming events where visitors want to scroll through options.
- Monthly calendar grid: A traditional calendar layout where events appear on their respective dates. Best for businesses with frequent events like studios, venues, or community centers.
- Slider/carousel: Displays events in a horizontal slider. Works well on homepages where you want to feature upcoming events without taking up too much vertical space.
- Single event widget: Highlights one specific event. Use this on landing pages or in sidebars to promote your next big event.
To change the layout, click on the Events widget in the Editor, select "Settings," and choose your preferred display. You can also adjust how many events show at once and whether past events remain visible.
Syncing Your Wix Calendar with Google Calendar
Connecting Google Calendar to your Wix events keeps everything in one place. There are two directions to this sync, and each works differently.
Adding Wix Events to Google Calendar
Each Wix event page includes an "Add to Calendar" button for visitors. When someone RSVPs or buys a ticket, they can add the event directly to their personal Google Calendar, Apple Calendar, or Outlook. This happens automatically - you don't need to configure anything.
Displaying Google Calendar on Your Wix Site
If you already manage events in Google Calendar and want to display them on your Wix site, you can embed your Google Calendar. We have a full walkthrough on how to add Google Calendar to Wix that covers the embed process step by step. This approach works well if your events originate in Google Calendar and you want a read-only calendar view on your website.
Two-Way Sync Workaround
Wix doesn't offer native two-way sync with Google Calendar. However, you can use third-party automation tools like Zapier or Make (formerly Integromat) to create a connection. Set up a trigger so that when a new event is created in Wix, it automatically creates a corresponding event in Google Calendar, and vice versa.
Managing RSVPs and Attendees
Once events are live and people start registering, you need to manage your guest list. Here's what you can do from the Wix dashboard.
- View the guest list: Go to Events > select an event > Guest List to see everyone who has registered, including their RSVP status and any custom form responses.
- Export attendees: Download the guest list as a CSV file for use in spreadsheets, email marketing tools, or check-in apps.
- Send email updates: Use the built-in email tool to message all registered attendees with updates, reminders, or last-minute changes. You can also set up automated confirmation emails and reminder emails that go out at a time you choose before the event.
- Check-in attendees: On event day, use the Wix Owner app on your phone to check in guests as they arrive. This is especially useful for ticketed events where you need to verify purchases.
- Set a guest limit: Cap the number of registrations. Once the limit is reached, the RSVP or ticket button automatically changes to "Sold Out" or "Event Full."
Promoting Your Events
Creating the event is only half the work. Getting people to attend requires promotion. Here are practical ways to drive registrations.
- Share on social media: Each event has a shareable link. Post it on your social channels with the event image and key details (date, time, what attendees will get).
- Use Wix email marketing: If you collect subscriber emails through your site, send an event announcement to your list. Include a direct link to the RSVP or ticket page.
- Add events to your homepage: Place the Events widget on your homepage so every visitor sees upcoming events. The slider layout works well for this without overwhelming the page.
- Optimize for search: Write a clear event title with relevant keywords. Fill in the meta description for the event page. Add location details so the event can appear in local search results. For more on Wix SEO in general, see our guide on how to set up Wix Events.
- Create early bird pricing: For ticketed events, offer a discounted early bird price that expires before the event. This creates urgency and drives early registrations.
Tracking Event Performance
Wix provides analytics for each event so you can see what's working and what needs adjustment.
- Event page views: See how many people visited the event page versus how many actually registered. A low conversion rate might mean the description needs work or the price is too high.
- Registration source: Find out where your registrants came from (direct traffic, social media, email campaigns) so you can focus your promotion efforts on the channels that perform best.
- Revenue tracking: For paid events, track total ticket revenue, refunds, and average ticket price directly from the dashboard.
- Attendance rate: Compare the number of registrations to actual check-ins to understand your no-show rate. If it's high, consider sending more reminders or requiring a small deposit.
* read the rest of the post and open up an offer